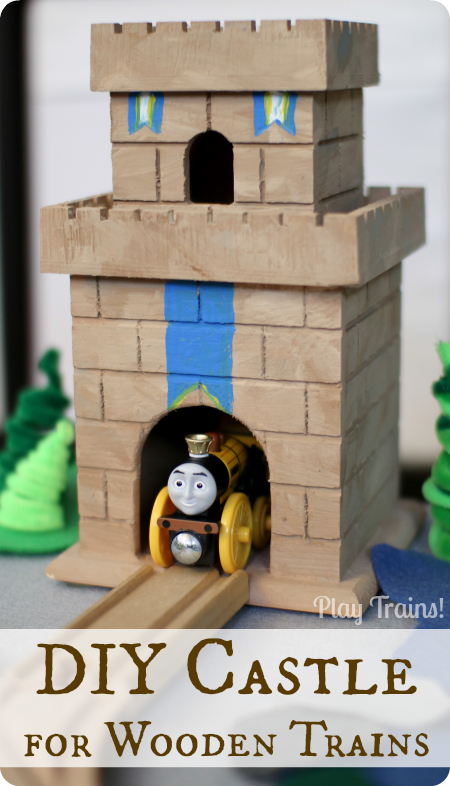
These DIY wooden toy castles look fantastic with our wooden train tracks, but they were so easy — and inexpensive! — to make. This is a fun project to do with a child, teaching them about measurement along the way, or to give as a gift to round out a train collection with a unique piece. And they’re perfect for celebrating the release of Thomas & Friends’ new movie, King of the Railway.
This post contains links to Amazon.com. If you click on one, we will receive a small commission — at no additional cost to you — on anything you buy at Amazon for a certain length of time afterwards. Read our disclosure policy for more details.
We’ve been waiting for King of the Railway to be released for months, and today it’s finally available! (You can get the movie on DVD or Blu-ray, or rent or buy it today on Amazon Instant Video.) Between reading King of the Railway books and watching the trailer (and fan videos) on YouTube, we can’t wait to have time to sit down and watch the whole movie.
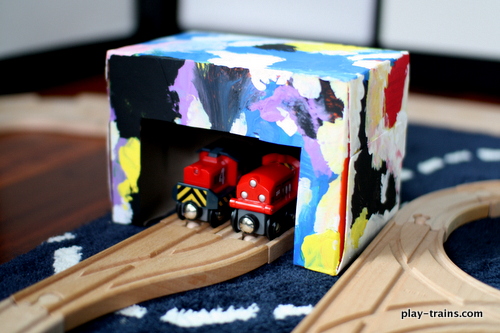
As always, we like to be able to play out our favorite videos and books with our wooden trains. So when I spotted these wooden birdhouses made to look like castles at Michael’s, I couldn’t leave the store without one. And because I had a $5 off coupon — the price of one castle — we ended up taking home two. I don’t want to give away the ending of the story too much, but I knew it would be fitting to have a castle for each of two different engines to “sleep” in.
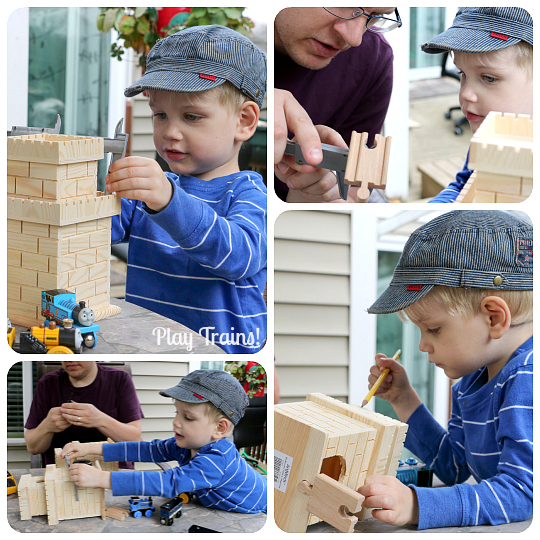
I enlisted my husband’s help to add a hole for the wooden tracks to connect to the castle and widen the entrance so a wooden train could fit through it. It was so fun to watch him teach the Little Engineer how to measure trains, castle, and tracks, and how to make decisions about how big to make the holes and openings. My husband wanted me to point out that my son’s toy caliper is accurate enough to use for the job. I think they both enjoyed using one of the Little Engineer’s tools on a real project.
Note: if you have a child helping with this project, make sure they stand back while power tools are in use. Safety goggles are a good idea, too.
Directions:
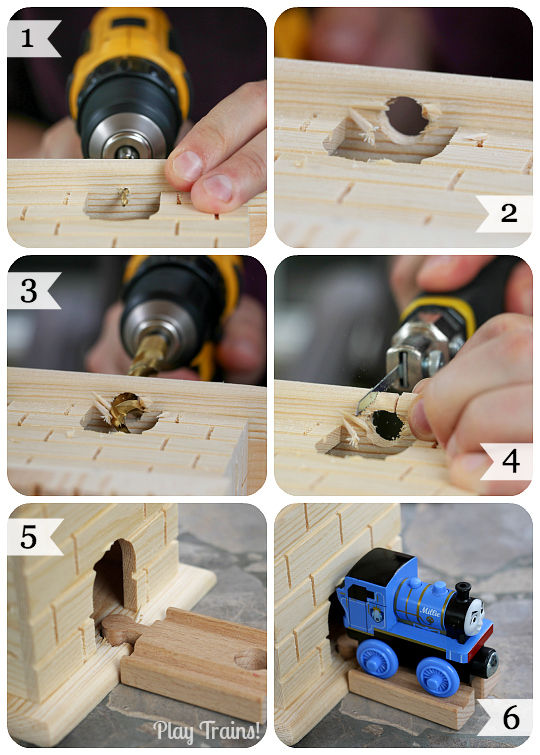
For the track connection:
1. The castles are built from pine, which is very soft and prone to splintering. We found it was necessary to drill a smaller pilot hole first to avoid some of that. Make sure to center it in front of the opening to the castle after using a piece of track to figure out how far back the hole will need to be.
2. This is the step where I admit to being human and numbering my steps out of order. But this is exactly the kind of hole you want to have after step 3!
3. Following the pilot hole, drill a hole wide enough to accommodate the peg connector on the wooden track. I think my husband said he used a 1/2 inch drill bit, but double check that.
4. With a small handsaw, cut in toward the hole to fit the shape of the peg-end of the track. You’ll want to use a more finely-toothed saw than the one pictured; we switched blades to minimize splintering soon after this picture was taken.
5. Pull away any splinters, sand the edges, and test a piece of wooden track.
6. The Little Engineer thought it was also a good idea to test a train on the track, just in case.
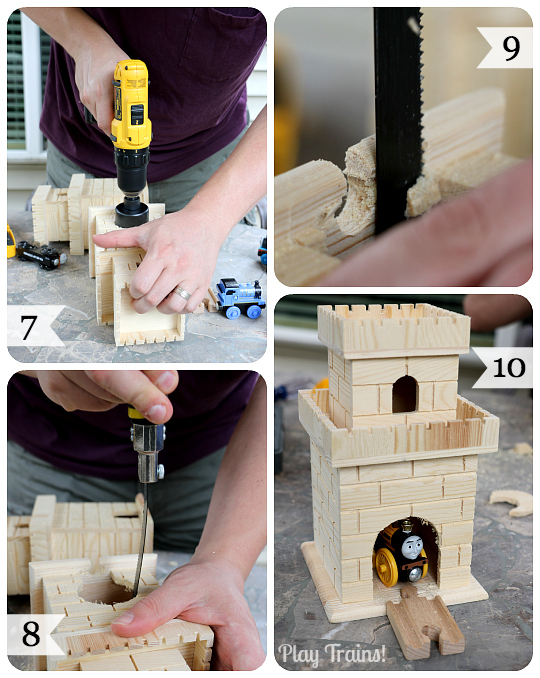
For widening the entrance to the castle:
7. Measure how high and wide the entrance needs to be, based on the size of the largest train. Use a hole saw to cut out the top of the new, larger entrance.
8. With the handsaw, saw straight down the sides of the new entrance.
9. When we broke away the thin strips on the sides, there was a small bit of wood stuck with glue to the base of the castle. Use the handsaw to remove it.
10. Sand the edges and test again…and again!
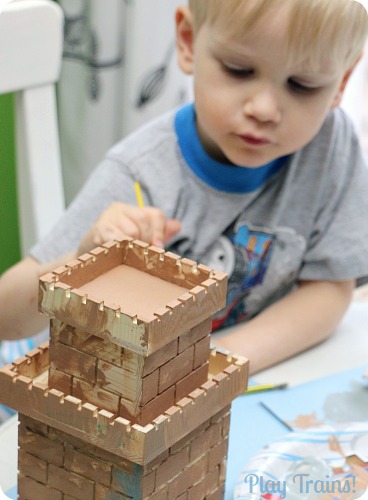
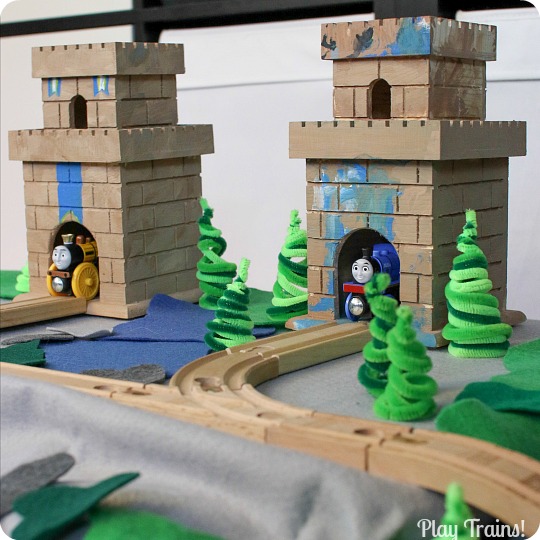
The final step is painting and decorating the castle. I checked the color of the castle in a King of the Railway book and tried to match its sandstone-like color by mixing yellow and a reddish brown into white craft paint. I layered lighter and darker tones as well as some gray to give it a natural appearance. I had been planning to make the blue, yellow, and white banners from felt and glue them on, but the Little Engineer really wanted to paint his, so that’s what we did. I’ll probably go back and make mine look more like the ones in the movie later (the paint took a long time to dry), or maybe I’ll fight my perfectionist tendencies.
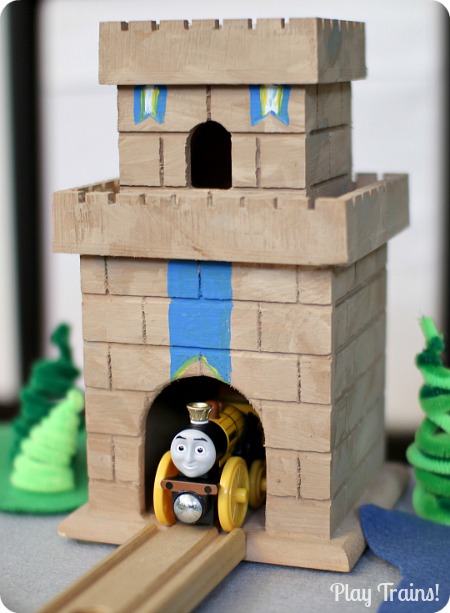
Here’s my castle, with the wooden version of Stephen, the new major character in the movie:
And here’s the Little Engineer’s castle with the wooden version of Millie, another new character (a new favorite at our house, along with Stephen):
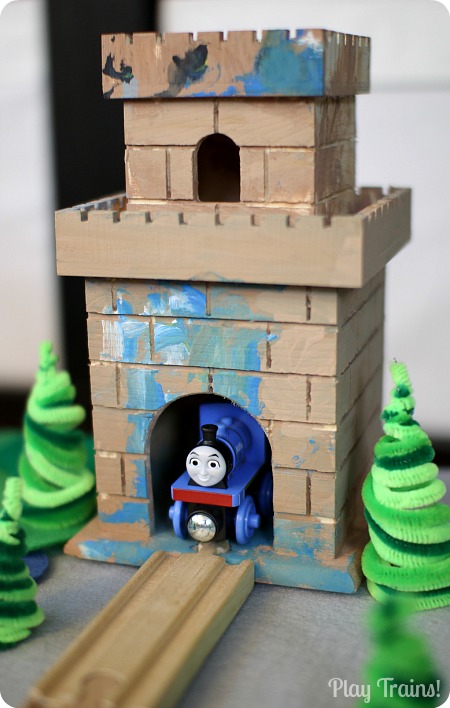
I think his looks way cooler than mine! Seriously…that’s not just a mother’s bias talking. In person, his looks more interesting. Instead of fixing the banners, I may just paint over them and ask him to do it for me.
When we were working on our Floating Word Discovery Bottles, I also laminated some stickers to play with, including two Sir Topham Hatt and the Earl of Sodor stickers from The Secret of the Mine, a coloring book based on the movie that comes with several glow-in-the-dark stickers. They fit the size of the castle nicely.
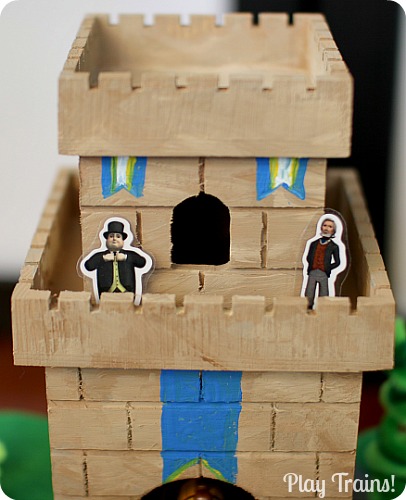
I’m really pleased with the way these turned out. The engines fit perfectly inside the castles, and they look really nice with the wooden track. I think we’re going to be playing with these for a long time to come!
If you’re interested in more DIY train set projects, check out some of ours:
Upcycled Wooden Train Track Platform
Love your idea!! I got a castle birdhouse at michaels today. My little man helped me paint it and daddy cut the opening as you suggested. He added another opening to the other side to make it more of a castle tunnel…such a great idea. Thanks for sharing!! 🙂
How wonderful! Thanks for telling me!! I thought of the tunnel idea, too, but we thought the trains might derail a bit too often for my son without rail grooves going through the castle. And he wanted them to be places for the trains to sleep. 🙂 But I’m really happy to hear it worked!
Wow, such a great idea! You’ve got me thinking about what I can do with the two little birdhouses we painted a little while ago, but which are no longer seeing much action…hmmm. 🙂
This is so creative!! It would never have occurred to me in a million years, but I love it!
Such a creative idea! My goodness! And I love those pipe cleaner trees – so cute!!! I just used them in my Small World Play for my wee one —- thank you for sharing!
How adorable! We just read our first book about Stephen and his adventures… I think this one may become one of our favorite Thomas stories very quickly!
Love this! I wonder if I could put a router through the base of the bird house and give it track to keep it from derailing somehow to make a tunnel. Hmmm.
Food for thought. Excellent.
Lay a long straight track on the underside, trace, and cutout. Use Gorilla glue to attach the straight track to the house base. Now you have a track through the castle.