A year and a half ago, the Little Engineer developed a fascination with meerkats within the space of one episode of Curious George. Soon thereafter, we took him to the Woodland Park Zoo for their Halloween festivities, and he had one and only one animal on his to-visit list: the “meekats”, as he called them.
When we reached their habitat, he was barely out of his stroller when he started bellowing, “MEEEKAAAAAT! MEEKATS MEEKATS MEEEEEEEEEKAAAAAAAAAATS!” with the biggest grin on his face. In the gift shop, my husband found a plush meerkat who seemed to have a twinkle in his eye. He was, of course, named Meekat.
At the time, the Little Engineer didn’t let many of his stuffed animals play trains with him. Engineer Bear was allowed to play with a gray freight train, and Strawberry Kitty had her “kitty train,” a colorful engine with spinning flower cars that reminded him of a picture in a book of a “kiddie train”. Meekat, however, was allowed to play trains right away, and quickly became Henry’s one and only driver. (For the uninitiated, Henry is one of the main Thomas the Tank Engine characters, a great honor for a new engine driver indeed).
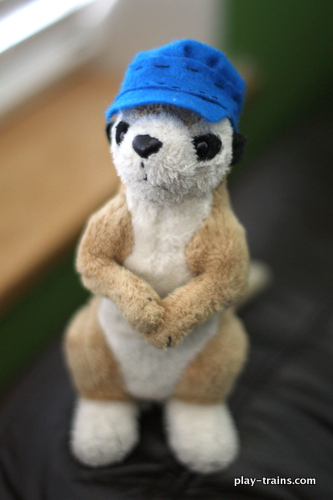
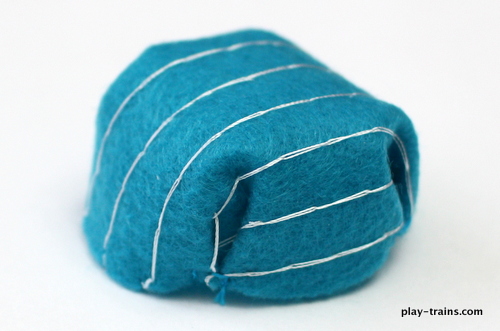
It was obvious Meekat was meant for a life on the railroad. Two days after he moved in, I decided to make him an engineer’s hat. I sat down next to the Little Engineer with a piece of cheap blue felt, needle, thread, and scissors. I worked while the Little Engineer played, and not too long after that I gave Meekat this:
I was shocked with how well it turned out, given that I don’t know much about sewing. I had meant this hat to be a prototype from which I’d make a pattern for a more permanent version. But it was so cute, and the Little Engineer loved it so much, that Meekat wore it daily for the next six months.
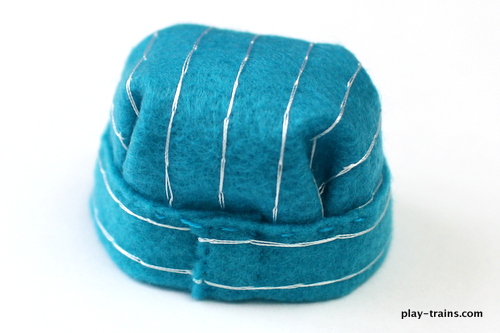
As you can see, other than getting slightly fuzzy, it held up pretty well for something that was hastily tacked together by an inexperienced seamstress:
But one of the seams was starting to come loose, and I had never given up on the idea of making a really nice hat for the little meerkat. He had proved to be a loyal fireman and a dedicated engineer, and he deserved the very best engineer hat I could give him. Plus, I still wanted to make a pattern from it. So I took the above picture and, swallowing my nerves, tore apart the well-loved hat.
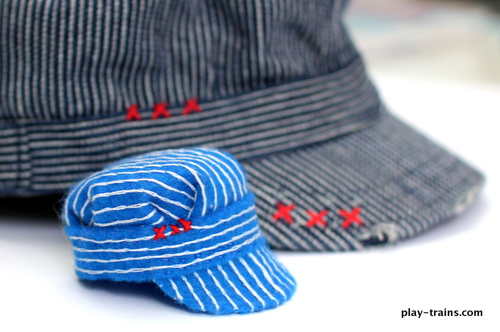
After spending too much time embroidering the lines too close together on my first try, I got distracted from the project. Poor Meerkat went bare-headed while it took me another five months to get around to starting over. But once I did, I was rewarded for following through with an adorable hat.
Like I did on my Engineer Heart Pendants, I added a few red Xs to the band to match the Little Engineer’s hat. I would’ve added them to the brim as well, plus a little red tag where his hat has one, but the Little Engineer nixed that idea.
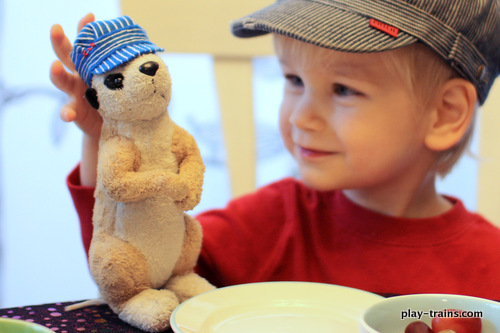
The delay on finishing the new hat had its silver lining. The hat was ready just in time for Meekat’s birthday/adoption anniversary. We had a lovely tea party in his honor, with freshly-baked chocolate chocolate-chip muffins. We wrapped up the hat, and the Little Engineer proudly presented it to Meekat. Meekat, of course, was overjoyed.
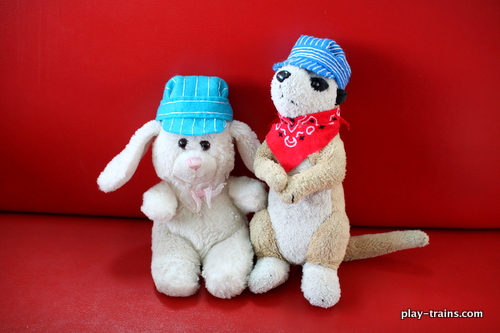
I had been wanting to make another hat to photograph the steps in the process, and our play date at the Seattle Monorail gave me the perfect reason. The Little Engineer was very excited to meet the famous Monorail Bunny, and I suggested we make a hat for a gift. He whole-heartedly approved of that idea. Somehow, I made it the perfect size, and Monorail Bunny loved it as much as Meekat loved his!
One great thing about this project is that you can involve your child in it with my Paper Engineer Hat Craft for Kids. I got the idea for it when I printed out the pattern to make Monorail Bunny’s hat, and the Little Engineer loved making a hat of his own.
What you’ll need:
- one piece of felt (You won’t need anywhere near the whole piece of felt, unless you’re sizing up the pattern.)
- thread in a matching color
- white embroidery thread for the stripes – optional (In the pictures below, I used regular white thread because I ran out of white embroidery thread, but it’s harder to work with and doesn’t show up as well.)
- embroidery needle
- scissors
- the pattern — free download at the end of this post
Instructions:
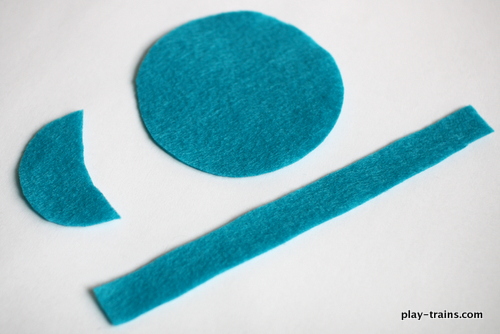
First, cut out the pattern, and use it to cut out the brim, band, and crown of the hat from the felt:
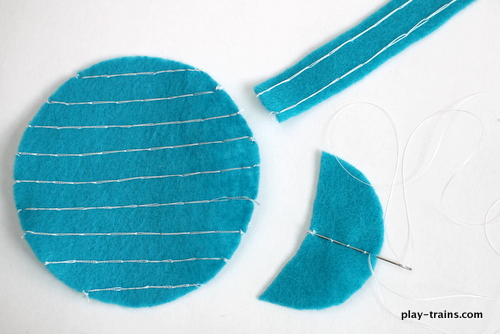
If you’d like to embroider the hickory stripes onto the hat, do that next. I start with the crown. Fold it in half, and press the fold firmly with your fingers. Use that crease as a guide for the first line of stitches straight down the middle, then stitch lines at regular intervals to each side of the center line. I used a split stitch, with one strand of embroidery thread doubled up, bringing the needle up between the two strands each time. (If that makes sense.)
The lines on this hat are about twice as far apart as the lines on Meekat’s hat, which has a little more substance than Monorail Bunny’s hat ended up with. But speaking from experience, I wouldn’t do them any closer together than that, or with more strands of embroidery thread. The felt becomes too stiff, and the white starts to overwhelm the blue. I’m guessing there needs to be at least a 2:1 ratio of blue (or whatever color you’ve chosen) to white.
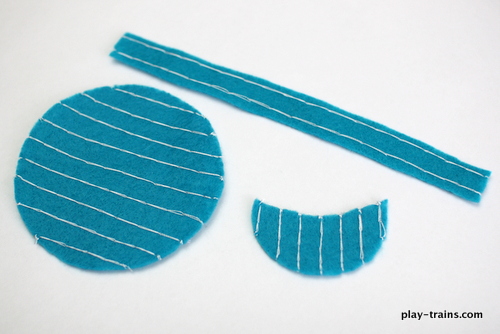
This goes pretty easily, but takes more time than the rest of the hat put together. The only really tricky part for me has been the brims. I wanted there to be white lines on the underside of the brim, because that would be visible. I ended up running the thread back along the underside, stitching underneath where the stitches from the top of the brim showed through.
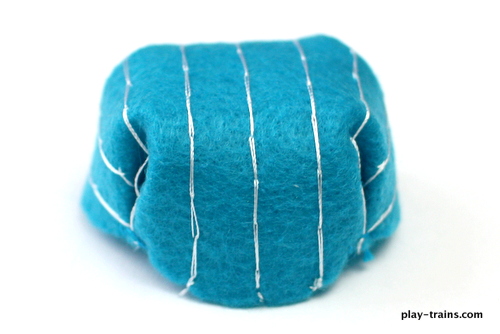
Here are all the pieces of the hat, embroidered and ready to go. Now, I really have no formal knowledge of sewing, but a bit of Googling tells me that what I did was make something like an inverted pleat at each of the four “corners” of the hat (half way between the center point of the front or back of the hat and the mid point of each side).
To do that, take the crown, find the center line, and decide how wide you want the front of the hat to be. Pinch that point and fold it back toward what will become the side of the hat. Pinch a matching point on the side and fold it forward to the first. It may be more helpful to see how I folded the paper craft version of this hat than to have me to try to describe it further.
Once I figured out how big I wanted each pleat, I sewed the points down to the fabric they were folded over and also to each other, drawing the needle through the loop of each stitch to make them as strong as possible.
Then I sewed the band around the crown, starting and ending in the back. You can see how I stitched a sort of rectangle around where the ends of the band overlapped.
Once the band is on, all that’s left is to sew the brim on, this time with a double row of stitches. I like to line the brim’s center line up with the center line of the front of the hat and adjust its placement until it looks right to me. Then I start stitching from the center, just below the bottom white line on the brim, and stitch to one side of the brim, turn around and stitch all the way across above the white line on the brim, and then stitch back underneath that white line to the center again. I check the placement of the brim after every two or three stitches to make sure it’s where I want it to be.
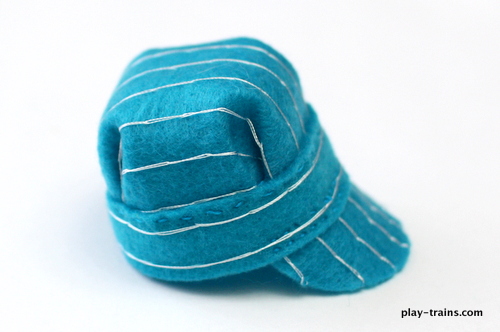
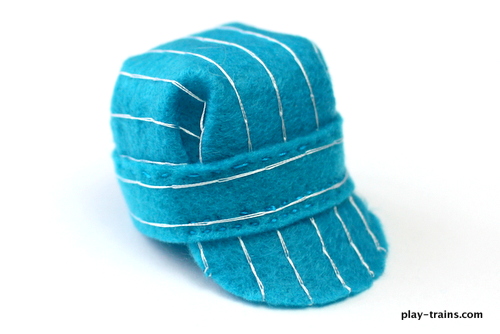
And then it’s finished! Here are a couple more views, in case they’re helpful:
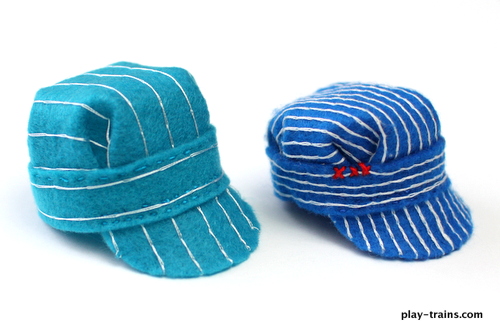
I mentioned above I had a couple of pointers to share about sizing. First off, these two hats were made by following exactly the same pattern:
The difference in size comes, I think, from three different factors:
1) The extra embroidery on the dark blue hat seems to have tightened up the material slightly.
2) The amount of material I pinched into the pleats was different between the two.
3) I sewed the top of the brim to the bottom of the crown on the light blue hat, whereas on the dark blue one I sewed the brim much higher up, so that the crown almost comes down to the bottom of the brim on the inside.
None of these differences were intentional on my part, but they worked out, because a hat the size of Meekat’s hat would’ve been too small for Monorail Bunny.
If you have the stuffed animal handy while you’re making the hat, you can adjust things as you go to get a good fit. Make sure to double check the size of the band; I made Meekat’s a little too tight the second time around, and it doesn’t stay on as well as the first hat I made.
As far as the size of the pattern, you can resize it as you need…I wish I could be more help than that! If you’re making a hat for a medium or large stuffed animal, you’ll probably want to make the pattern bigger, cut it out, and then put together a paper mock-up of the hat to check the size.
I hope that was clear enough. And if you make one of these hats, please share a picture with me! The Little Engineer and I would be excited to see it.
[box type=”download”] Download the free pattern for our Felt Engineer Hat for Stuffed Animals[/box]



Sew very cute. Enjoy your Little Engineer. Before you know it he will be a Big Engineer driving the really big trains. ( a mother’s voice of experience)
Thanks! Yes, we’re feeling the passing of time especially keenly this month. Lots of growing up going on!
Beyond adorable! Another post I’m pinning. Engineer and I may need to make these during the summer. 🙂 Thanks for sharing at Stress-Free Sunday at Fun-A-Day!
It would be a great summer project. The Little Engineer is too young to help with this, but he did really enjoy helping with design decisions…the color of Monorail Bunny’s hat, and the decorations on Meekat’s. 🙂 Thanks for the pins!
Oh my goodness!! Those are just entirely toooooo cute!!! Great job!!
Thanks for sharing at Sharing Saturday!
Thanks!
Thank you for sharing your project with us at A Crafty Soiree! I’ve seen several girl friendly projects for dolls and animals and it’s much harder to find ones the little guys might also be interested in. What a great idea! I’ve featured yours in this weeks and I hope you’ll come by to see it and share more of your crafty skills!
Thank you again for featuring our hats…I love linking up at your party!
Thanks for putting this little tutorial together. I came across it as I was searching for a train engineer hat for a teddy bear. We are having Teddy Bear Train (wagon) rides at my daughter’s 2 year old “Teddy Bear Picnic” birthday party – this was exactly the cute and simple/inexpensive solution I needed. Because I was looking for a simple solution, I used white puffy paint that I already had on hand to do the white stripes, which was super quick and easy! I also used felt glue to attach all the pieces together, and added some elastic thread loops on the sides that go around the bear’s ears to hold the hat on. Thanks again for posting your adorable project.
Great ideas! I’ll share them up above for others to see. Thanks! And so glad the tutorial was helpful! (I would love to see pictures of the teddy bear train if you have a chance!)
this is adorable!