Trees are a classic component of wooden toy train sets. But as much as I love the cute little wooden trees we’ve collected, most of them are barely three-dimensional, just a simplified outline of a tree given enough depth to stand up. Generally painted a single shade of green, there’s no texture or color variation to set them apart as organic in contrast to the hard lines of the trains.
Coming from the Pacific Northwest, my experiences of trees and trains involve passing beneath towering, verdant evergreens. One of the most magical memories I have from my youth is riding on a night train through forested hills in Oregon, staring out at the trees rushing past. So it’s no surprise I started longing for slightly more realistic trees to go with our trains.
Like all the best ideas, the way to accomplish that came to me through play — my own play this time, not the Little Engineer’s. I’ve written before about how Hiro ended up being “Mama’s train” in our house. From time to time, we play out Hiro’s story with our wooden trains. To amuse myself, I started making more and more elaborate version’s of “Hiro’s hideaway,” the overgrown track where he was left to rust.
I used the flat wooden trees and some real rocks to surround his track with natural elements. But still, his siding didn’t look overgrown. One day, I added some green and brown pipe cleaners twisting above my beloved engine like fuzzy vines. As I arranged and rearranged them, it occurred to me I could make the more realistic trees I’d been wanting.
With a little experimentation, I came up with something I really like. These trees probably won’t stand up to heavy play, but if they get squished, we can just straighten the pipe cleaners out and make them all over again!
Pipe Cleaner Trees for Wooden Train Layouts
To make the trees, you will need:
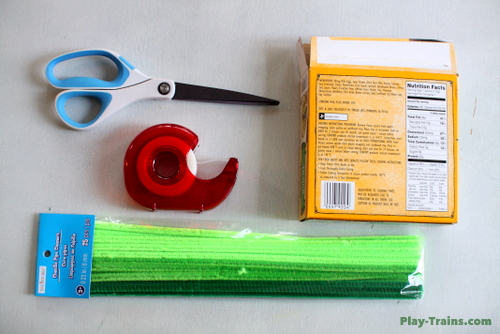
- scissors
- scotch tape
- a piece of thin cardboard or cardstock (I pulled a box from the recycling bin)
- pipe cleaners in the colors of your choice (I got this pack of three shades of green at Michael’s)
The first thing to do is make a tall, narrow cone from the small piece of cardboard. Cut it into a triangle with one rounded side. If a child will be helping with the trees, I recommend rounding the corners, because mine were pretty sharp. Roll the cardboard into a tight cone and secure well with the tape.
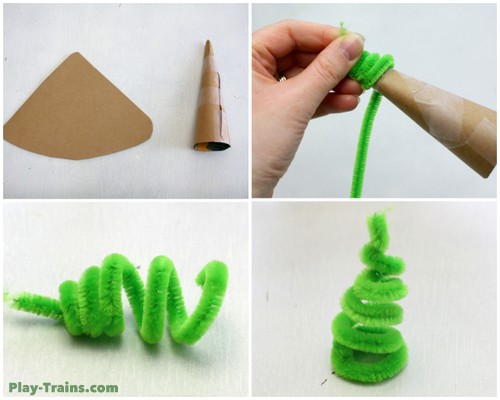 Next, line up a pipe cleaner so that it sticks out a little over the top of the cone. Pinch the cone and the end of the pipe cleaner and hold it with one hand. With your other hand, tightly wrap the pipe cleaner around the cone, keeping it as perpendicular as possible so the finished tree can stand up straight. Make sure to keep wrapping until you have curled the end of the pipe cleaner around the cone.
Ease the pipe cleaner off the cone. Twist the very top of the tree a little to finish it off. Then tuck the end of the pipe cleaner up inside the tree so it can sit flat. After that, bend and adjust the tree until it stands up straight and you like the way it looks.
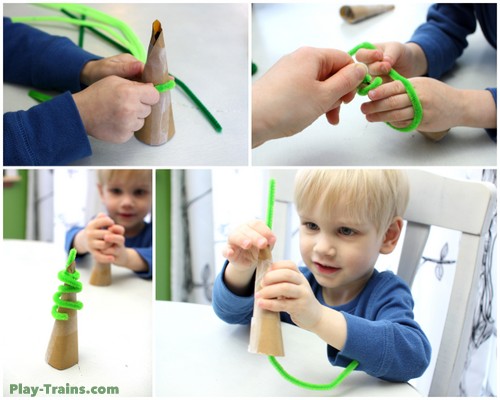
The Little Engineer (who is almost three-and-a-half now) was a bit too young to make a tree on his own. But he really enjoyed trying, and also making one with my help.

The tree he and I made together is the small one on the right. It doesn’t look too much different from the trees I did by myself, so this works as a train set craft for young preschoolers to help with, and older kids to do on their own.
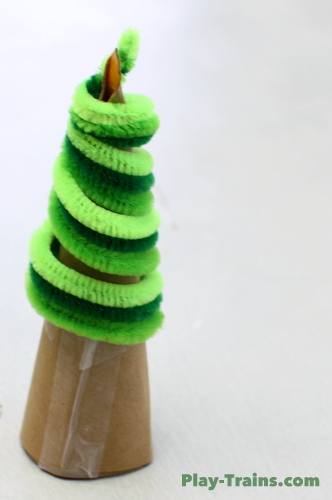
After I made a few out of only one pipe cleaner each, I experimented with using two, three, or four, and mixing the colors. I really liked the way this looked, especially because these pipe cleaners weren’t as fluffy as the ones I’d used on the prototype tree for this project. The only difference in technique is it helps to twist the tops of the pipe cleaners together before wrapping them around the cone.
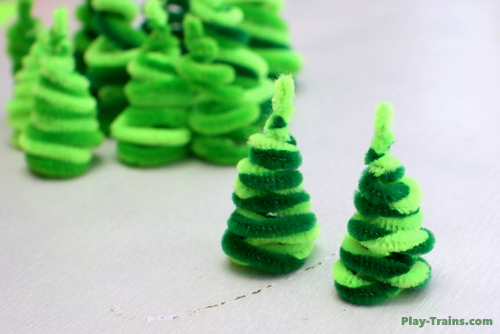
Here are trees that I made with two pipe cleaners twisted together along their full lengths, which also looked pretty cool. The one on the left was a looser twist than the one on the right.
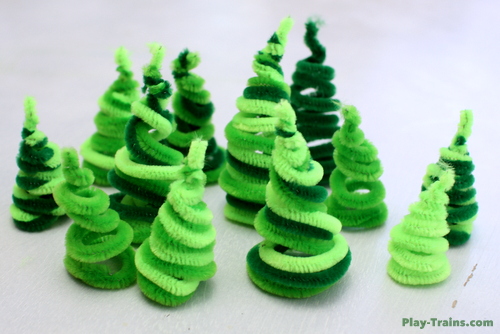
It didn’t take long to grow ourselves a forest! Then it was time to add them into a layout. I added couple of upcoming projects in this series as the background and the landscape, and then asked the Little Engineer to pick out a train to photograph.
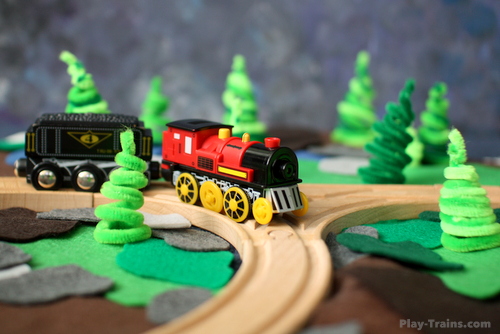
I love the combination of (relative) realism and whimsy that these trees add to the train layout. No two are alike, heightening the resemblance to real trees. I also liked the way they felt completely different from the usual elements of a wooden train set.
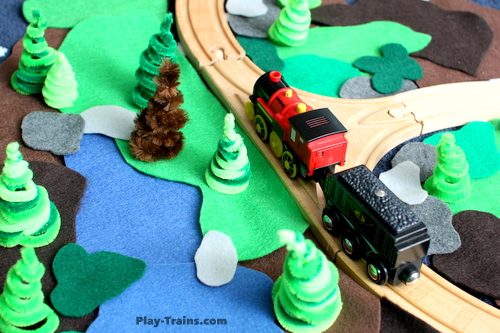
In addition to using the three shades of green, I made one lone, dry brown tree. I plan to experiment with other colors — candy-colored trees, pink and purple trees, black and gray trees. It’s exciting how a simple change to the colors suggests an entirely new landscape to the imagination.
The Little Engineer definitely liked the trees. When I was editing the photos for this post, I watched him moving the trees and setting them gently in around the tracks. He must have taken my warning not to squish them to heart.
For more ideas like this one, check out the other posts in Make Trains!, our ongoing series of DIY projects for kids’ wooden train layouts.
Seasonal Pipe Cleaner and Pom Pom Trees
Cherry Blossom Spring Pom Pom Tree
Pipe Cleaner Pine Trees
Summer Pom Pom Tree
Pipe Cleaner and Pom Pom Palm Tree
Apple Harvest Pom Pom Tree
Fall Pom Pom Tree
Spooky Pipe Cleaner Trees
Halloween Carnival Colors Pom Pom Trees
Pipe Cleaner Christmas Trees
Light-up Pipe Cleaner Christmas Trees
Snow and Ice Winter Pom Pom Trees


These are just GREAT, Jessica! We use pipe cleaners for lots of things, but I’ve never thought to make trees out of them! I love the multicoloured ones! You’ve given me lots of inspiration here – I’m thinking of all the things I could use these for!
Thank you, Jackie! I’m so excited to have inspired you! I really love the multicolored ones, too…I didn’t make anymore single color ones after I made one of those.
What a great idea!! I love how they came out! Thank you for sharing at Sharing Saturday!
Thank you!
We could always use more trees for our train set ups. Thanks for the great idea!
Glad you like them! I always want more trees for our trains, too. 🙂
Love these they are so cute and perfect for our train layouts. I think I might have to make them in a rainbow variety of colors. Pinned!
Thanks, Sam! I think a rainbow of trees would be beautiful!
I absolutely love these little trees – they are just wonderful. What a super addition to a railway track 🙂
These trees are awesome! They could come in handy for so many different projects. Thanks for linking up to the Discover & Explore forest theme this week!
Love these trees. Thanks for the idea! I went into my sons room and Kevin, the crane was moving the trees around. Didn’t realize they would be magnetic with the metal in them :).